Introduction – Why Gluten-Free Sourdough Starter
More and more people struggle with gluten intolerance or choose to reduce gluten in their diet for health reasons. For many, traditional wheat bread can cause discomfort, poor digestion, or inflammation. Gluten-free baking offers an alternative, but not all gluten-free bread is created equal.
This is where a gluten-free sourdough starter makes a real difference.
A gluten-free sourdough starter is a natural culture made from gluten-free flour and water, fermented by wild yeast and beneficial bacteria. Just like traditional sourdough, it helps improve digestibility, flavour, and texture. The long fermentation process supports gut health, makes nutrients more available, and avoids many unnecessary additives often found in shop-bought gluten-free bread.
Using a gluten-free sourdough starter allows you to bake fresh, naturally fermented bread at home, with full control over ingredients and quality. It is a step in the right direction for people who want cleaner, more mindful eating while avoiding gluten.
It’s important to remember that healthy bread is only one part of a healthy lifestyle. Even the best sourdough should be enjoyed as a complement to a balanced, varied diet – not as its foundation. When used wisely, gluten-free sourdough can be a nourishing and satisfying addition to your daily meals.
In this guide, you will learn step by step how to care for your gluten-free sourdough starter so it stays active, stable, and ready for baking whenever you need it.
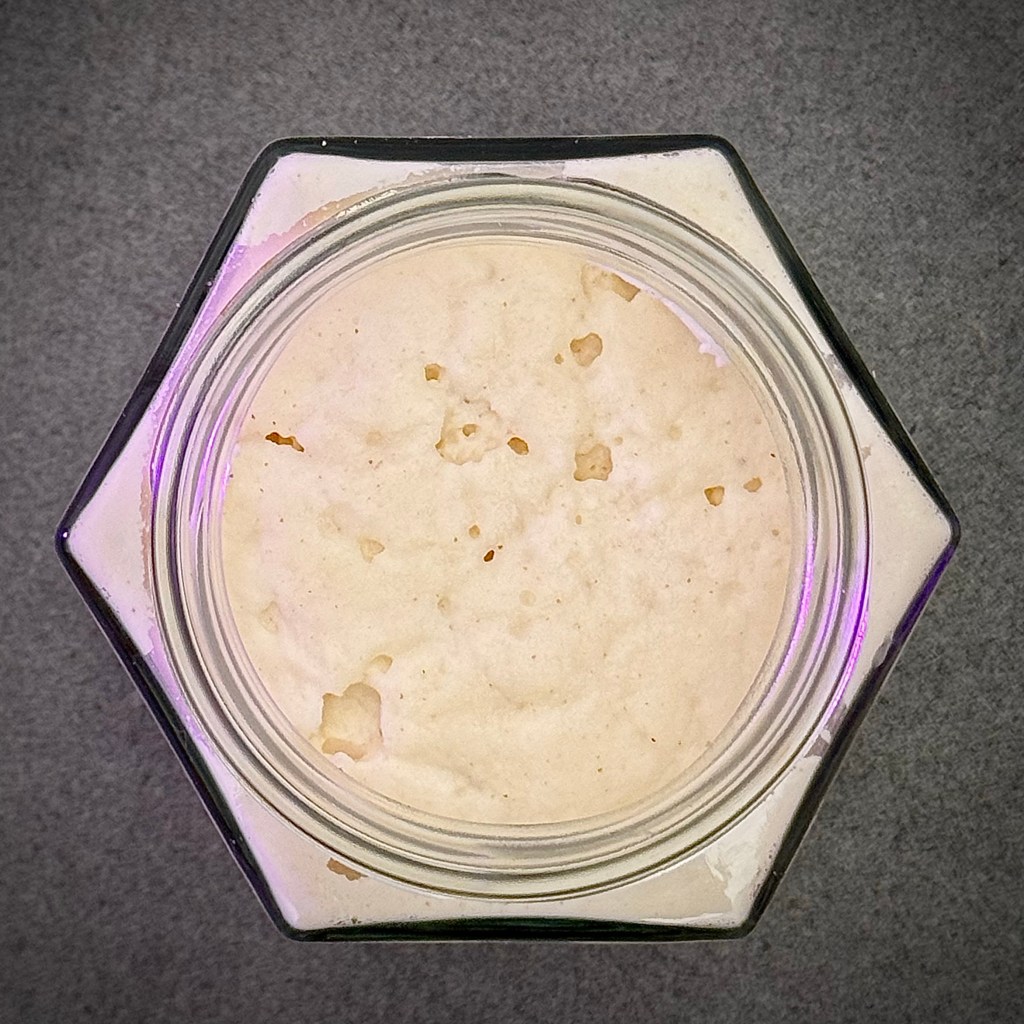
Table of Contents
- Introduction – Why Gluten-Free Sourdough
- What Is a Gluten-Free Sourdough Starter
- After It Arrives – First Steps
- Choosing the Right Gluten-Free Flour
- Water – What to Use and Why It Matters
- Understanding Fermentation in Gluten-Free Starters
- The 1:1:1 Feeding Method (Beginner Friendly)
- The 1:5:5 Feeding Method – Slower & More Stable
- How to Feed Your Gluten-Free Starter (Step by Step)
- Consistency – What Your Starter Should Look Like
- How to Store Your Starter
- Keeping Your Starter on the Counter
- Storing Your Starter in the Fridge
- Feeding Schedule – Daily vs Weekly Care
- Discard – What It Is and How to Use It
- When Your Gluten-Free Starter Is Ready to Bake
- Common Problems and Simple Fixes
- Reviving a Weak or Neglected Gluten-Free Starter
- Basic Gluten-Free Sourdough Baking Tips
- Final Notes – Building Good Habits
2. What Is a Gluten-Free Sourdough Starter
A gluten-free sourdough starter is a living, fermented culture made from gluten-free flour and water. It contains wild yeast and beneficial lactic acid bacteria that develop naturally from the environment and the flour itself. These microorganisms work together to ferment the flour, produce natural gases, and create flavour – just like in traditional sourdough.
The main difference is the flour.
A traditional sourdough starter is usually made with wheat or rye flour, which contains gluten. Gluten forms an elastic network that traps gas and helps bread rise easily. In a gluten-free sourdough starter, there is no gluten, so the structure, behaviour, and fermentation are different.
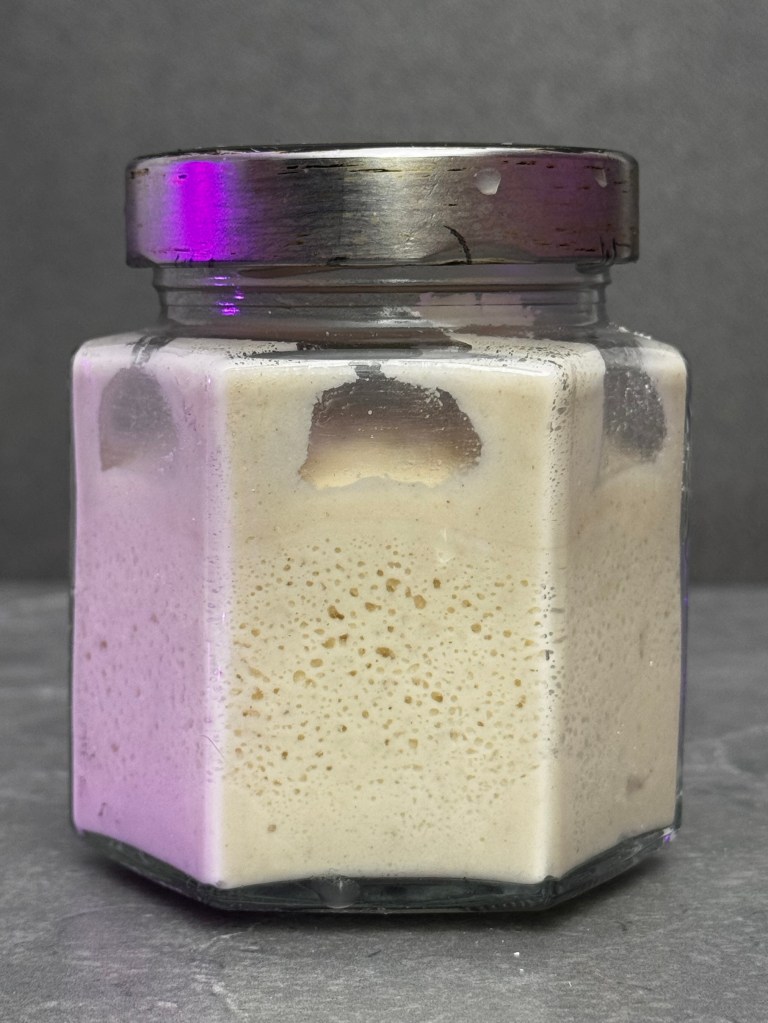
Because gluten-free flours do not form a strong gluten network:
- The starter will look looser or more paste-like
- It may not rise as high as wheat-based starters
- Bubbles are often smaller and more evenly spread
- Activity is seen more in bubbling and aroma than in dramatic volume increase
Despite these differences, a gluten-free sourdough starter is just as alive and powerful when cared for correctly.
Gluten-free sourdough starters are commonly made using flours such as:
- Rice flour
- Brown rice flour
- Buckwheat flour
- Sorghum flour
- Millet flour
Each gluten-free flour feeds the starter slightly differently and affects flavour, activity, and texture. Over time, you will learn how your starter behaves and which flour works best for your baking style.
Just like a regular sourdough starter, a gluten-free starter:
- Needs regular feeding
- Reacts to temperature
- Can become weak if neglected
- Improves with good habits and consistency
Although gluten-free sourdough requires a little more attention and patience, it rewards you with better flavour, improved digestibility, and naturally fermented bread without gluten.
In the next section, we will look at what to do after your gluten-free sourdough starter arrives, and how to prepare it for its first feeding.
3. After It Arrives – First Steps
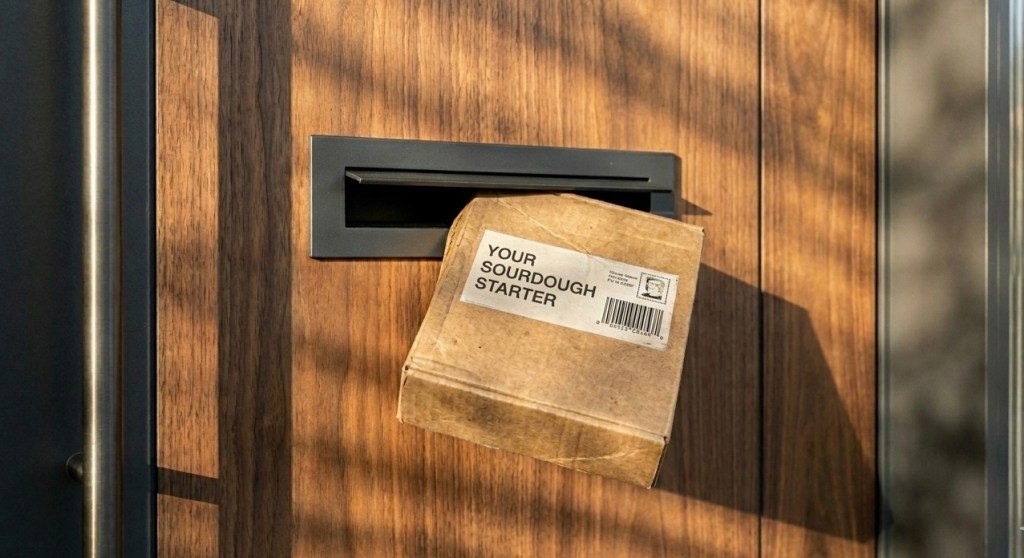
Your gluten-free sourdough starter is a living culture of yeast and bacteria. It was fed before dispatch so it could survive the journey and arrive in good condition. However, transport, temperature changes, and time in transit can slow it down. This is completely normal and nothing to worry about.
When your starter arrives, the first thing to do is stay calm and observe it.
1. Check the temperature
If your starter arrives cold (for example during winter or after long transit), do not feed it immediately. Let it rest at room temperature first.
- Place it on the kitchen counter
- Leave it for 2–4 hours
- Ideal temperature: around 20–25°C
This allows the yeast and bacteria to wake up gently.
If the starter arrives already at room temperature, you can move on to the next step.
2. Prepare your tools
Before feeding your starter, prepare:
- A small glass jar or container
- Gluten-free flour (the type you plan to use regularly)
- Clean drinking water
- A spoon or spatula
Keeping everything clean helps prevent unwanted bacteria or mould.
3. Remove the starter from the packaging
Your starter is packed in a sealed food-safe bag.
To remove it easily:
- Cut off one side or the bottom of the bag
- Lay it flat on the counter
- Use a spatula to gently scrape the starter out
This method reduces waste and makes handling easier.
4. First gentle feeding
For the first feeding, keep things simple and small.
- Add 2 tablespoons of gluten-free flour to your jar
- Add 2 tablespoons of water
- Add 2 tablespoons of the delivered starter
- Mix well until smooth
Gluten-free starters often look thicker or more like a paste. This is normal.
5. Rest and warmth
Place the jar in a warm spot:
- Around 20–22°C
- Away from direct sunlight
- Loosely covered (not airtight)
Leave it to rest overnight.
6. What to expect
By the next day, your starter should show signs of life:
- Small bubbles
- A mild, slightly sour smell
- A soft, airy texture
It may not double in size like a wheat starter – this is normal for gluten-free sourdough.
From this point, your gluten-free sourdough starter is ready to be fed regularly and prepared for baking.
In the next section, we will focus on choosing the right gluten-free flour and how it affects your starter.
4. Choosing the Right Gluten-Free Flour
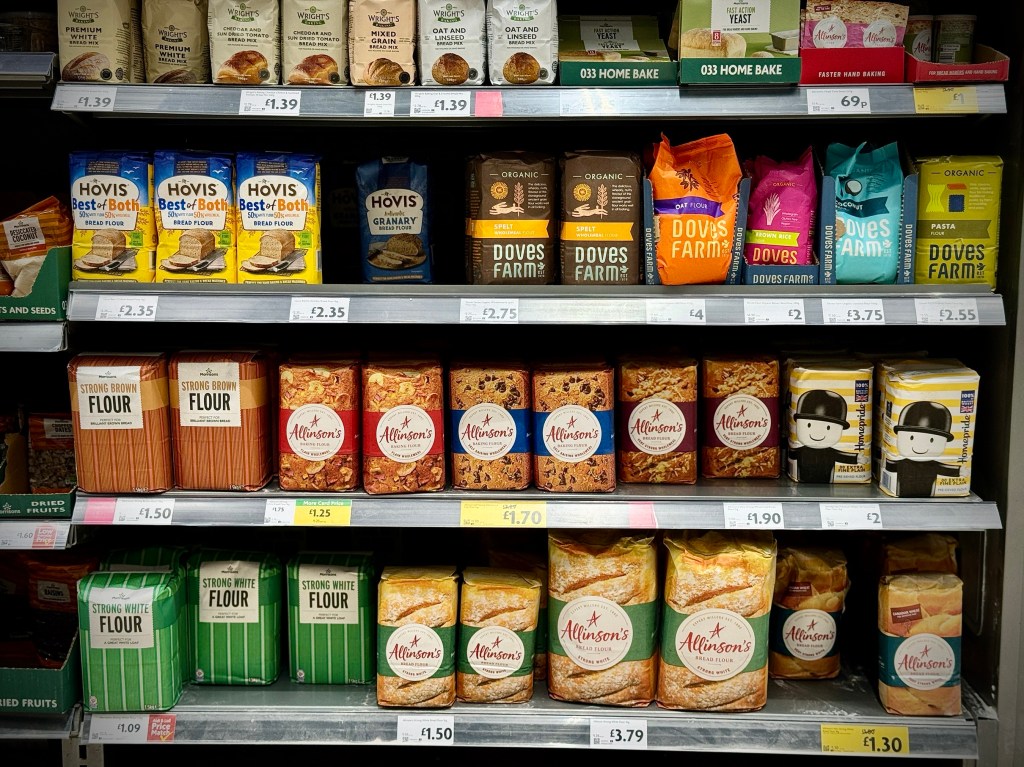
Choosing the right gluten-free flour is one of the most important steps in caring for a gluten-free sourdough starter. The flour you use feeds the yeast and bacteria, affects fermentation speed, flavour, texture, and overall stability of your starter.
Not all gluten-free flours behave the same way, and some are much better suited for sourdough fermentation than others.
Best flours for a gluten-free sourdough starter
Brown rice flour
This is one of the most popular and reliable choices.
- Rich in nutrients that feed wild yeast
- Creates a stable and active starter
- Mild, neutral flavour
- Easy to find
Highly recommended for beginners.
White rice flour
- Lighter and milder than brown rice flour
- Produces a gentler flavour
- Slightly lower in nutrients
It works well but may ferment more slowly. Many bakers mix it with brown rice flour for better results.
Buckwheat flour (naturally gluten-free)
- Very active and strong
- Rich in minerals
- Distinct, earthy flavour
Excellent for building strength, but the flavour may be intense for some people.
Sorghum flour
- Balanced flavour
- Supports good fermentation
- Produces a smooth starter texture
A great option for regular feeding or blending with rice flour.
Millet flour
- Mild and slightly sweet
- Supports steady fermentation
- Light flavour profile
Good for people who prefer a softer taste.
Flours to avoid (or use with caution)
- Ready-made gluten-free flour blends (often contain starches only)
- Cornflour / corn starch
- Tapioca starch
- Potato starch
These flours and starches lack nutrients and will not support a healthy, long-term starter on their own.
Consistency matters
Once you choose a flour, try to stick to it. Constantly changing flours can confuse the fermentation and weaken your starter. If you want to change flour, do it gradually over several feedings.
Water absorption
Gluten-free flours absorb water differently than wheat flour. Some need more water, others less. Your starter should be:
- Thick but mixable
- Similar to thick yoghurt or soft paste
Adjust water slowly and observe how your starter responds.
Using the right flour will make your gluten-free sourdough starter:
- More stable
- Easier to maintain
- Better tasting
- More reliable for baking
In the next section, we will look at water – what to use and why it matters.
5. Water – What to Use and Why It Matters

Water is just as important as flour when it comes to caring for your gluten-free sourdough starter. It activates fermentation, feeds the microorganisms, and affects the strength and stability of your starter.
Even small differences in water quality can change how your starter behaves.
Best water for a gluten-free sourdough starter
Filtered water
This is the best and safest choice.
- Free from chlorine and harsh chemicals
- Supports healthy yeast and bacteria activity
- Provides consistent results
Bottled still water
- A good alternative if filtered water is not available
- Choose plain, non-carbonated water
- Avoid mineral-heavy or flavoured water
Tap water
Tap water can be used, but with caution.
- Chlorine and chloramine may weaken fermentation
- Quality varies depending on location
If using tap water:
- Let it sit in an open container for at least 12 hours to allow chlorine to evaporate
- Or boil it, let it cool completely, and then use it
Water temperature
Water temperature affects fermentation speed.
- Lukewarm water (20–25°C) is ideal
- Cold water slows fermentation
- Hot water can damage or kill the yeast
Always use water that feels neutral or slightly warm to the touch.
Why water matters more in gluten-free starters
Gluten-free flours absorb water differently and lack gluten structure. This means:
- Hydration directly affects texture and activity
- Too little water can make the starter dense and inactive
- Too much water can make it weak and unstable
The goal is balance.
Your starter should be:
- Moist and smooth
- Easy to mix
- Thick, but not dry
Consistency over perfection
You don’t need “perfect” water. What matters most is consistency. Using the same type of water every time helps your starter stay predictable and stable.
In the next section, we will explain how fermentation works in gluten-free sourdough starters and what signs of activity to look for.
6. Understanding Fermentation in Gluten-Free Starters
Fermentation is the heart of every sourdough starter, including gluten-free sourdough. It is the natural process where wild yeast and beneficial bacteria feed on the flour and produce gas, acids, and flavour.
While the principles are the same as in traditional sourdough, gluten-free fermentation behaves differently, and understanding this will help you care for your starter with confidence.
What happens during fermentation
Inside your gluten-free starter:
- Wild yeast produces carbon dioxide (gas)
- Lactic acid bacteria produce mild acidity
- The mixture develops flavour, strength, and stability
This process makes gluten-free bread:
- Easier to digest
- Better tasting
- More natural and additive-free
Key differences from wheat sourdough
Because gluten-free flours do not contain gluten:
- There is no strong elastic network to trap gas
- The starter may not rise dramatically
- Activity shows more as bubbles, texture change, and aroma
This means you should not judge a gluten-free starter only by how much it rises.
Signs of healthy fermentation
A healthy gluten-free starter will show:
- Small to medium bubbles throughout
- A soft, airy or slightly spongy texture
- A fresh, mildly sour smell (not sharp or unpleasant)
- Gentle expansion rather than a big rise
These are all positive signs.
Fermentation speed
Fermentation speed depends on:
- Temperature
- Type of flour
- Hydration level
- Feeding ratio
In warm conditions, gluten-free starters ferment faster. In cooler kitchens, they move more slowly. This is normal.
Over-fermentation and hunger
A starter that has fermented too long may:
- Separate or become very watery
- Smell overly sour or sharp
- Lose bubbling activity
This simply means the starter is hungry and needs feeding. It does not mean it is ruined.
Patience is essential
Gluten-free sourdough requires more observation and patience than wheat sourdough. With regular feeding, stable temperature, and consistent flour and water, your starter will become stronger and more predictable over time.
In the next section, we will go through the 1:1:1 feeding method, which is the easiest and most reliable approach for beginners.
7. The 1:1:1 Feeding Method (Beginner Friendly)
Regular feeding is essential to keep your gluten-free sourdough starter healthy, active, and reliable. One of the easiest and most effective ways to do this is the 1:1:1 feeding method, especially for beginners.
What does 1:1:1 mean?
The 1:1:1 method means feeding your starter with equal parts starter, flour, and water by weight.
For example:
- 30 g gluten-free sourdough starter
- 30 g gluten-free flour
- 30 g water
After feeding, you will have 90 g of refreshed starter.
Using weight rather than spoons gives more accurate and consistent results, which is particularly important for gluten-free fermentation.
Why this method works well for beginners
- Easy to remember
- Creates a predictable fermentation rhythm
- Helps build strength in a young or new starter
- Makes it easier to understand how your starter behaves
This method encourages regular activity without overwhelming the culture.
Step-by-step feeding
- Take a small amount of active starter (for example, 30 g).
- Place it in a clean jar or container.
- Add the same weight of gluten-free flour.
- Add the same weight of water.
- Mix thoroughly until smooth and lump-free.
- Loosely cover the jar and place it in a warm spot (20–22°C).
What to expect after feeding
- Bubbles should start forming within a few hours
- The texture will become lighter and more airy
- The aroma should be mildly sour and fresh
Do not expect a dramatic rise. Gluten-free starters show activity differently than wheat-based ones.
Feeding frequency
- Feed once a day if kept at room temperature
- In warm kitchens, feeding may be needed every 12 hours
- If the starter smells very sour or looks flat, it is hungry
Keeping the quantity small
To avoid excess discard:
- Keep only a small amount of starter
- Feed smaller quantities using the same ratio
For example:
- 1 tablespoon starter
- 1 tablespoon flour
- 1 tablespoon water
The ratio stays the same even when the amounts are smaller.
Consistency is key
Feeding your starter at similar times each day, using the same flour and water, will help it become stable and strong.
In the next section, we will look at the 1:5:5 feeding method, which is slower and more stable and works well when you are not baking often.
8. The 1:5:5 Feeding Method – Slower & More Stable
While the 1:1:1 feeding method is excellent for beginners and for preparing a starter for baking, it can sometimes ferment too quickly—especially in warm kitchens. This is where the 1:5:5 feeding method becomes very useful.
This method is ideal when you want to keep your gluten-free sourdough starter healthy and stable without feeding it too often.
What does 1:5:5 mean?
The 1:5:5 method means:
- 1 part starter
- 5 parts gluten-free flour
- 5 parts water
All measured by weight.
Example:
- 10 g starter
- 50 g gluten-free flour
- 50 g water
This gives the starter much more food and slows down fermentation.
Why use the 1:5:5 method?
- Fermentation is slower and more controlled
- The starter stays active longer without becoming hungry
- Reduces excessive acidity
- Creates a more balanced flavour
- Ideal for maintenance when you are not baking daily
Gluten-free starters can weaken if they spend too much time hungry. This method helps prevent that.
When this method is best
- You are not baking every day
- Your starter peaks and collapses too quickly
- The starter smells very sharp or acidic
- You want fewer feedings
It is especially useful in warm environments.
How to feed using 1:5:5
- Keep a small amount of starter in the jar (for example, 10 g).
- Add 50 g gluten-free flour.
- Add 50 g water.
- Mix well until smooth and evenly hydrated.
- Loosely cover and leave at room temperature.
A thicker consistency is recommended, as it ferments more slowly and is easier to manage.
What to expect
- Slower rise and activity
- Steady bubble formation over many hours
- A milder, more balanced aroma
- Less risk of over-fermentation
Do not worry if it takes longer to show activity—this is normal and intentional.
Switching between methods
You can move freely between 1:1:1 and 1:5:5 depending on your needs:
- Use 1:5:5 for maintenance
- Switch to 1:1:1 when preparing for baking
This flexibility helps keep your gluten-free starter strong and reliable.
In the next section, we will go through how to feed your gluten-free starter step by step, with clear practical guidance.
9. How to Feed Your Gluten-Free Starter (Step by Step)
Feeding your gluten-free sourdough starter is a simple process, but it must be done with care and consistency. Regular feeding keeps the yeast and bacteria alive, balanced, and ready for baking.
Below is a clear, step-by-step method you can follow every time.
Step 1: Observe your starter
Before feeding, look at your starter:
- Is it bubbly or slightly airy?
- Does it smell mildly sour or neutral?
If it smells very sharp, looks flat, or watery, it is hungry and ready to be fed.
Step 2: Prepare a clean container
Using a clean jar or container helps prevent mould and unwanted bacteria.
- Glass jars work best
- Avoid metal containers
You can either feed in the same jar or transfer a portion to a fresh one.
Step 3: Keep a small amount of starter
To avoid waste:
- Keep only a small amount of starter (for example, 10–30 g)
- Discard or set aside the rest
Gluten-free starters can be built up quickly when needed.
Step 4: Add flour
Add your chosen gluten-free flour:
- Use the same flour consistently
- Weigh the flour for accuracy
Example:
- 30 g gluten-free flour (for 1:1:1)
- 50 g gluten-free flour (for 1:5:5)
Step 5: Add water
Add water gradually:
- Use room-temperature or lukewarm water
- Mix as you add to avoid lumps
The mixture should be smooth and thick, not runny.
Step 6: Mix thoroughly
Mix until:
- No dry flour remains
- The texture is even and smooth
- The starter looks well hydrated
Gluten-free starters benefit from thorough mixing.
Step 7: Cover and rest
- Loosely cover the jar (not airtight)
- Place it in a warm spot (20–22°C)
- Avoid direct sunlight
Airflow is important, but the starter should not dry out.
Step 8: Fermentation time
- Activity may appear within a few hours
- Full fermentation may take 8–24 hours
- Look for bubbles and aroma rather than volume
Step 9: Repeat regularly
- Feed daily if kept on the counter
- Use a higher ratio (1:5:5) for longer intervals
- Adjust based on temperature and activity
Key reminders
- Always feed by weight when possible
- Keep quantities small
- Stay consistent with flour and water
- Observe your starter rather than the clock
In the next section, we will discuss consistency—what your gluten-free starter should look like and how to adjust it if needed.
10. Consistency – What Your Starter Should Look Like
Consistency is especially important when working with a gluten-free sourdough starter. Because there is no gluten, the texture of the starter tells you more about its health than its rise.
Learning to recognise the right consistency will help you keep your starter strong and stable.
Ideal consistency
A healthy gluten-free sourdough starter should be:
- Thick but easy to mix
- Smooth and paste-like
- Similar to thick yoghurt or soft porridge
It should not be dry, crumbly, or stiff, and it should not be watery or runny.
After feeding
Right after feeding, your starter will look:
- Dense and smooth
- Slightly glossy
- Well hydrated
This is normal. Activity develops over time.
During fermentation
As fermentation progresses, the starter may:
- Become lighter and more airy
- Show small bubbles throughout
- Slightly expand rather than rise dramatically
A gentle change in texture is a good sign.
Signs the starter is too dry
- Difficult to mix
- Cracks on the surface
- Very slow or no bubbling
If this happens:
- Add a small amount of water
- Mix thoroughly
- Adjust hydration slowly over the next feedings
Signs the starter is too wet
- Very runny or soupy texture
- Separation of liquid
- Weak or unstable fermentation
If this happens:
- Use less water at the next feeding
- Keep the starter slightly thicker
- Switch to a higher feeding ratio if needed
Flour affects consistency
Different gluten-free flours absorb water differently:
- Wholegrain flours need more water
- White flours need less
- Buckwheat absorbs water quickly
Always adjust water based on feel, not strict numbers.
Thickness and fermentation speed
- Thicker starters ferment more slowly
- Thinner starters ferment faster
For maintenance, a slightly thicker consistency is easier to control and more stable.
Trust your observations
With gluten-free sourdough, visual cues and texture matter more than volume. Over time, you will learn what “healthy” looks and feels like for your starter.
In the next section, we will cover how to store your gluten-free sourdough starter and choose the best method for your baking routine.
11. How to Store Your Gluten-Free Sourdough Starter
Proper storage is essential to keep your gluten-free sourdough starter healthy, active, and easy to manage. The goal is to give the natural yeast and bacteria a stable environment while matching the storage method to how often you bake.
Best container
Always store your starter in:
- A glass jar or food-safe container
- With enough space for slight expansion
- Loosely covered (not airtight)
Glass is ideal because it does not react with acidity and is easy to keep clean.
Avoid:
- Metal containers
- Strange shape.
- Very large jars (they encourage keeping too much starter)
Keep the quantity small
You do not need a large amount of starter.
- A small quantity is easier to maintain
- It reduces flour waste
- You can always build more when needed
Gluten-free starters grow quickly when fed properly.
Two storage options
There are two main ways to store your gluten-free starter:
- On the kitchen counter
- In the fridge
Both methods work well. The right choice depends on how often you bake.
- If you bake several times a week, keep it on the counter
- If you bake once a week or less, store it in the fridge
Many bakers use both methods at different times.
Cleanliness matters
- Use clean utensils every time
- Wipe the sides of the jar after feeding
- Replace the jar occasionally
Clean storage reduces the risk of mould and unwanted bacteria.
Temperature awareness
Gluten-free starters are sensitive to temperature:
- Warm temperatures speed up fermentation
- Cold temperatures slow it down
Choose your storage method based on your kitchen temperature and routine.
In the next sections, we will look in detail at:
- Keeping your starter on the counter
- Storing your starter in the fridge
Each method will be explained step by step.
12. Keeping Your Starter on the Counter
Keeping your gluten-free sourdough starter on the kitchen counter is the most common and practical method, especially if you bake regularly. This approach keeps the starter active, responsive, and ready to use at short notice.
When this method is best
Store your starter on the counter if:
- You bake two or more times a week
- You want your starter ready at any time
- Your kitchen temperature is fairly stable
This method encourages steady fermentation and strong activity.
Ideal conditions
- Temperature: 20–22°C
- Away from direct sunlight
- Not next to a radiator or oven
In colder months, you may need to find a slightly warmer spot after feeding.
Feeding frequency
When kept on the counter:
- Feed your starter once a day
- In warm kitchens, it may need feeding every 12 hours
If the starter smells very sour, looks flat, or watery, it is hungry.
Simple daily feeding routine
- Keep a small amount of starter (1–2 tablespoons or 10–30 g).
- Feed using 1:1:1 for active use, or 1:5:5 for maintenance.
- Mix well until smooth.
- Loosely cover and leave at room temperature.
Consistency is more important than exact timing.
What to expect
A healthy counter-kept starter will:
- Show bubbles within hours of feeding
- Have a soft, airy texture
- Smell mildly sour and fresh
It may not rise much in volume, and this is normal for gluten-free sourdough.
Learning from observation
Keeping your starter on the counter allows you to:
- Observe fermentation closely
- Learn how temperature affects activity
- Understand when your starter is at its best
Over time, this daily interaction helps you become more confident and consistent in gluten-free sourdough baking.
Important reminder
Never let your starter sit unfed for long periods at room temperature. Regular feeding is essential to keep it strong and reliable.
In the next section, we will explain how to store your gluten-free sourdough starter in the fridge, step by step.
13. How to Store Your Gluten-Free Sourdough Starter in the Fridge
Storing your gluten-free sourdough starter in the fridge is helpful if you bake less often, but it must be done correctly. Only a healthy and active starter should be stored cold.
Important rule first
Only put a strong, active starter in the fridge.
If your starter:
- looks weak
- smells unpleasant
- shows little activity
do not place it in the fridge.
First, keep it at room temperature and feed it daily until it becomes active and stable again.
The fridge slows fermentation — it does not fix a weak starter.
Why occasional room temperature time matters
A gluten-free starter should not live in the fridge all the time.
From time to time, it is very beneficial to:
- take it out of the fridge
- keep it at room temperature for a few days
- feed it daily
This refreshes the natural yeast and bacteria and keeps the starter strong long-term.
Think of the fridge as a pause, not a permanent home.
Before placing the starter in the fridge
Always feed your starter first.
- Feed using 1:1:1 or 1:5:5
- Mix until smooth
- Leave at room temperature for 1–2 hours
This allows fermentation to start before cooling slows it down.
Weekly fridge feeding routine (step by step)
If you feed your starter once a week:
- Take the jar out of the fridge
- Leave it at room temperature for 2–4 hours
(This helps it reach room temperature) - Remove a small amount (10–30 g) into a clean jar
- Feed with equal parts flour and water
- Mix well
- Leave at room temperature for 30–60 minutes
- Return it to the fridge
This routine keeps the starter healthy without over-fermenting.
What to expect in the fridge
- Very slow or no visible activity
- Possible thin liquid on top (this means hunger, not spoilage)
- Thicker texture than a wheat starter
These are normal signs in cold storage.
Signs your fridge-stored starter is healthy
- Mild, clean sour smell
- No mould
- Bubbles appear after feeding at room temperature
If anything smells rotten, cheesy, or unpleasant, discard and refresh the starter.
Proper fridge storage reduces work, but regular care and occasional warming are essential for long-term success.
In the next section, we will cover feeding schedules and long-term maintenance, so you can keep your gluten-free starter reliable and strong.
14. Feeding Schedules and Long-Term Maintenance
A gluten-free sourdough starter can stay healthy for years if it is fed regularly and maintained with care. The key is to match the feeding schedule to how often you bake and to support the starter over the long term.
There Is No Single Perfect Schedule
Every kitchen is different. Temperature, flour choice, and water all affect fermentation.
What matters most is consistency, not strict timing.
Choose a routine that fits your lifestyle and stick to it.
Daily Feeding (Counter Storage)
Best if you bake often or want an always-active starter.
- Feed at least once every 24 hours
- In warm kitchens, feed every 12 hours if needed
- Use 1:1:1 for regular baking – this may require two feedings per day
- Use 1:5:5 if you want a slower, more stable rhythm
Signs it is working well:
- Bubbles appear after feeding
- Mild, fresh sour smell
- Smooth, airy texture
Weekly Feeding (Fridge Storage)
Best if you bake occasionally.
- Feed once every 7 days
- Always let the starter warm up for 2–6 hours before feeding
- Feed, then return it to the fridge after 30–60 minutes
If you plan to bake:
- Take the starter out earlier
- Give one or two room-temperature feedings before use (if you think the starter is strong, you can bake right after warming it up).
Monthly Refresh (Strongly Recommended)
Even with good care, gluten-free starters benefit from a deeper refresh.
Once every 3–4 weeks:
- Take the starter out of the fridge
- Keep it at room temperature for 2–3 days
- Feed twice daily using 1:1:1, or once daily using 1:5:5
This strengthens fermentation and keeps the flavour balanced.
Keeping the Starter Strong Long-Term
To maintain a healthy starter:
- Keep the amount small (10–30 g)
- Use fresh gluten-free flour
- Use clean jars and utensils
- Change the jar regularly
Avoid:
- Leaving it unfed for long periods
- Keeping it permanently in the fridge
- Feeding irregularly
Understanding Weakness Early
A starter may need extra care if it:
- Takes a long time to show bubbles
- Smells very sharp or unpleasant
- Separates often
If this happens:
- Move it to room temperature
- Feed daily for a few days
Most starters recover quickly with regular attention.
Final Reminder
A gluten-free sourdough starter is a living culture.
It responds to care, patience, and routine.
Healthy bread is only one part of a healthy diet, but a well-maintained gluten-free sourdough starter allows you to bake fresh, natural bread that supports your body rather than stressing it.
15. Discard – What It Is and How to Use It
Discard is the portion of sourdough starter that you remove before feeding.
This is a normal and essential part of maintaining a healthy gluten-free sourdough starter.
Discard does not mean waste.
What Is Discard?
Each time you feed your starter, you keep only a small amount and remove the rest.
The removed part is called discard.
Discard is:
- Starter that is still safe to use
- Less active than a freshly fed starter
- Mildly sour
Removing discard keeps the starter balanced and prevents it from becoming too acidic.
Why Discard Is Necessary
Gluten-free starters ferment quickly and can become unbalanced if not reduced.
Discarding:
- Controls acidity
- Keeps yeast and bacteria in balance
- Reduces the amount of starter you need to feed
- Makes maintenance easier
Keeping too much starter often leads to weak fermentation.
When Discard Is Best Used
Discard is best used:
- Within 24–48 hours
- When kept in the fridge
- When it smells clean and slightly sour
Do not use discard if it:
- Smells rotten or unpleasant
- Shows mould
- Has been neglected for a very long time
How to Store Discard
- Keep discard in a sealed container
- Store it in the fridge
- Label the container with the date
Use or refresh discard regularly. Do not let it build up for weeks.
How to Use Gluten-Free Discard
Gluten-free discard is perfect for:
- Pancakes and waffles
- Flatbreads
- Crackers
- Muffins and quick breads
Discard adds flavour but does not provide strong lift.
It works best in recipes that use baking powder or bicarbonate of soda.
Can You Bake Bread with Discard?
Discard alone is not suitable for sourdough bread.
It is not active enough to raise dough properly.
For bread baking, always use:
- A freshly fed, active starter
- Starter at its peak activity
Final Thought
Discard is part of the sourdough cycle.
Used wisely, it reduces waste and adds flavour to everyday gluten-free baking.
16. When Your Gluten-Free Starter Is Ready to Bake
Knowing when your gluten-free sourdough starter is ready to bake is essential for good results. An active, well-timed starter gives better rise, flavour, and texture.
Gluten-free starters behave differently from wheat starters, so readiness is judged by activity and smell, not volume.
Feed Before Baking
Always feed your starter before baking.
- Use 1:1:1 for baking preparation
- Feed at room temperature
- Use fresh flour and water
After feeding, allow the starter to ferment until it reaches its peak activity.
Signs Your Starter Is Ready
Your starter is ready to bake when it:
- Shows many small bubbles throughout
- Looks aerated and lively
- Has a soft, spoonable texture
- Smells clean, mildly sour, and fresh
Gluten-free starters often do not double in size. This is normal.
Timing Matters
Most gluten-free starters are ready:
- 3–6 hours after feeding at room temperature
Timing depends on:
- Room temperature
- Flour type
- Feeding ratio
A starter that has peaked and just begins to relax is ideal for baking.
Simple Spoon Test
Drop a spoonful of starter into a bowl of water:
- If it floats, it is ready
- If it sinks, it needs more time
This test is helpful but not essential. Visual signs are more reliable for gluten-free starters.
If the Starter Is Not Ready
If your starter:
- Looks flat
- Has few bubbles
- Smells sharp or acidic
Give it more time or feed it again.
Never bake with a weak starter — it will affect both texture and flavour.
From Fridge to Baking
If your starter comes from the fridge:
- Take it out early
- Feed it once or twice at room temperature
- Wait for clear signs of activity
Patience at this stage always improves the final bread.
Final Reminder
Baking with sourdough is about timing and observation.
A ready starter feels alive and balanced.
In the next section, we will move into common problems and troubleshooting, so you know exactly what to do if something does not look or smell right
17. Common Problems and Simple Fixes
Even with good care, a gluten-free sourdough starter may sometimes behave differently than expected. This is normal. Most problems are easy to fix if you notice them early.
Below are the most common issues and simple, practical solutions.
Starter Is Not Bubbling
Possible causes:
- Too cold
- Starter is hungry
- Weak or old flour
Simple fixes:
- Move the starter to a warmer place
- Feed using 1:1:1 for a few days
- Use fresh gluten-free flour
- Reduce the amount of starter and feed a smaller quantity
Starter Smells Very Sour or Sharp
Possible causes:
- Long time between feedings
- Too much starter kept in the jar
Simple fixes:
- Feed more often
- Use 1:5:5 for better balance
- Keep a smaller amount (10–30 g)
- Do one or two room-temperature feedings
A clean, mild sour smell is healthy. Strong acidity means the starter is hungry.
Liquid on Top (Clear or Grey)
What it means:
- The starter is hungry
What to do:
- Stir it in or pour it off
- Feed the starter
This liquid is normal and not a sign of spoilage.
Starter Separates Quickly After Feeding
Possible causes:
- Too much water
- Very warm environment
Simple fixes:
- Use slightly less water
- Feed more often
- Move to a cooler spot
Gluten-free starters are naturally looser than wheat starters.
Starter Looks Thick but Inactive
Possible causes:
- Too dry
- Poor fermentation
Simple fixes:
- Add a little more water
- Mix very well during feeding
- Keep at room temperature
Starter Becomes Weak After Fridge Storage
This is normal.
Simple fixes:
- Take it out of the fridge
- Feed daily at room temperature for 2–3 days
- Use 1:1:1 to rebuild strength
Do not bake until activity returns.
Mould or Bad Smell
If you see mould or smell rot:
- Discard the starter immediately
- Clean the jar thoroughly
- Start again with a fresh culture
Do not try to save a mouldy starter.
Final Advice
Most problems come from:
- Irregular feeding
- Low temperature
- Keeping too much starter
Gluten-free sourdough rewards simple routines and observation.
18. Reviving a Weak or Neglected Gluten-Free Starter
A gluten-free sourdough starter is very resilient. Even if it has been neglected, it can often be revived with patience and proper care. Do not rush the process — strength returns step by step.
When a Starter Needs Reviving
Your starter may need reviving if it:
- Shows little or no bubbling
- Smells very sour, sharp, or unpleasant
- Has been unfed for a long time
- Has spent too long in the fridge
If there is mould or a rotten smell, do not revive it — discard it and start again.
Step 1: Bring It Back to Room Temperature
- Take the starter out of the fridge
- Let it sit at room temperature for 2–4 hours
This helps wake up the natural yeast and bacteria.
Step 2: Reduce and Refresh
- Take a small amount (10–20 g) into a clean jar
- Discard the rest
- Feed using 1:2:2
- Mix well until smooth
Keeping the amount small helps the starter regain balance faster.
Step 3: Feed Daily and Observe
- Keep the starter at room temperature
- Feed once or twice daily
- Use 1:2:2 until activity improves
Within 1–3 days, you should see bubbles and a fresher smell.
Step 4: Build Strength Slowly
As the starter improves:
- Bubbles appear sooner after feeding
- The smell becomes mild and pleasant
- The texture looks lighter and airy
At this point, you can:
- Continue with 1:2:2, or
- Switch to 1:5:5 for stability
Step 5: Be Patient
Revival takes time.
- Slight activity is progress
- Do not overfeed
- Do not rush to bake
Most neglected starters recover fully within 3–7 days.
Common Mistakes to Avoid
- Feeding too much flour at once
- Keeping the starter too cold
- Changing flours repeatedly
- Using chlorinated water
Simple, consistent care works best.
When the Starter Is Ready Again
Your starter is ready for normal use when it:
- Bubbles reliably after feeding
- Smells clean and mildly sour
- Looks alive and well-aerated
Only then should you return it to the fridge or prepare it for baking.
Final Encouragement
A weakened starter is not a failure — it is a reminder to slow down and observe.
With regular feeding and room-temperature care, a gluten-free sourdough starter almost always comes back to life.
19. Basic Gluten-Free Sourdough Baking Tips
Baking with a gluten-free sourdough starter is different from baking with wheat flour. Gluten-free dough behaves more like a thick batter than elastic dough, but with the right approach, it produces flavourful and nourishing bread.
These simple tips will help you get consistent results.
Use an Active Starter
Always bake with a freshly fed, active starter.
- Feed your starter before baking
- Use it at peak activity
- Do not use discard for bread
A weak starter leads to dense, heavy bread.
Think Batter, Not Dough
Gluten-free sourdough:
- Does not stretch
- Does not hold shape like wheat dough
Expect a soft, sticky, spoonable mixture rather than a kneadable dough.
Do not add extra flour to “dry it out”.
Hydration Is Higher
Gluten-free flours absorb water differently.
- Doughs need more water
- Thick but pourable consistency is ideal
The dough should slowly spread, not stand firm.
Mixing Matters
- Mix thoroughly to hydrate the flours
- There is no need to knead
- Scrape the bowl well
Proper mixing improves structure and crumb.
Fermentation Time Is Shorter
Gluten-free doughs ferment faster.
- Watch the dough, not the clock
- Over-fermentation can cause collapse
A gentle rise with visible bubbles is enough.
Proof Once, Not Twice
Most gluten-free sourdough breads:
- Work best with one rise only
- Are shaped immediately after mixing
This helps maintain structure.
Use Steam and a Hot Oven
- Bake in a well-preheated oven
- Steam helps oven spring
- Covered baking or a tray of hot water works well
Heat is essential for good rise and crust.
Cool Completely Before Cutting
Gluten-free bread continues to set as it cools.
- Let the bread cool fully
- Cutting too early makes it gummy
Patience improves texture.
Final Thought
Gluten-free sourdough baking is about observation and balance, not force or kneading.
With a healthy starter and gentle handling, you can bake bread that is flavourful, satisfying, and kind to your body.
20. Final Notes – Building Good Habits
Caring for a gluten-free sourdough starter is not about perfection. It is about building simple, repeatable habits that support a healthy, stable culture over time.
Small actions, done regularly, make the biggest difference.
Keep It Simple
- Keep a small amount of starter
- Feed it regularly
- Use the same flour and water when possible
Simplicity leads to consistency.
Observe More Than You Measure
- Watch bubbles and texture
- Smell the starter
- Notice how it responds to temperature
Your senses are better guides than strict rules.
Build a Routine That Fits Your Life
- Counter storage for frequent baking
- Fridge storage for occasional baking
- Regular room-temperature refreshes
A routine you can maintain is the best routine.
Do Not Fear Mistakes
Every baker experiences:
- Weak starters
- Missed feedings
- Failed loaves
Each mistake teaches you how your starter behaves.
Cleanliness and Care Matter
- Use clean jars and utensils
- Change jars regularly
- Avoid contamination
A clean environment supports healthy fermentation.
Remember the Bigger Picture
Sourdough bread is part of a healthy lifestyle, not the whole of it.
A well-maintained gluten-free sourdough starter allows you to:
- Bake fresh bread
- Control ingredients
- Support digestion
But balance in your overall diet always comes first.
Final Encouragement
Your starter is a living culture that responds to care, patience, and attention.
Treat it well, and it will reward you with flavour, reliability, and the joy of baking real gluten-free sourdough bread at home.
Happy baking.
