Introduction
When it comes to baking sourdough bread, the key ingredient that can make or break your loaf is a healthy, robust bread starter. In this post, we’ll explore the essentials of caring for your sourdough starter, ensuring it stays fresh and active whenever you’re ready to bake.
A well-maintained starter is crucial for achieving that perfect rise and delicious flavor in your bread. We’ll provide you with tips and techniques to nurture your starter, so it’s always ready to help you create mouthwatering loaves right from your kitchen. Whether you’re a beginner or an experienced baker looking to refine your process, this guide will empower you to master the art of sourdough baking.

Sourdough bread starter
In this comprehensive guide, you’ll learn all the essential details on how to take care of your sourdough bread starter. From understanding how to store and feed your starter correctly to managing the excess discard, this guide covers every aspect of maintaining a healthy and active sourdough starter. You’ll also learn how to troubleshoot common issues and cultivate a strong starter that produces consistent, high-quality bread. By following the 1:1:1 method, you’ll be able to feed your starter with the properatio of ingredients and develop a robust, active starter that is ready for your next baking adventure. This guide also provides valuable insight into how to maintain your sourdough starter on the kitchen counter, observe its behaviour, and learn how it rises. Lastly, you’ll discover what to do with any excess discard and how to use it to make delicious recipes. Armed with this knowledge, you’ll be able to elevate your sourdough bread baking skills and create delicious and wholesome bread with ease.
- What it is sourdough bread starter.
- After arrive.
- Flour.
- 1:1:1 method.
- 1:5:5 Method – A slower and more stable feeding approach.
- How to feed.
- How to keep it.
- In the fridge.
- On the counter.
- Discard.
- When is ready.
- Revival instruction.
- Classic Wheat & Rye Sourdough Loaf – Perfect for Beginners
- Wheat Sourdough: A Foolproof Recipe for a Perfect Loaf with Wholemeal Twist
- The 100% Rye Bread
What it is sourdough bread starter.
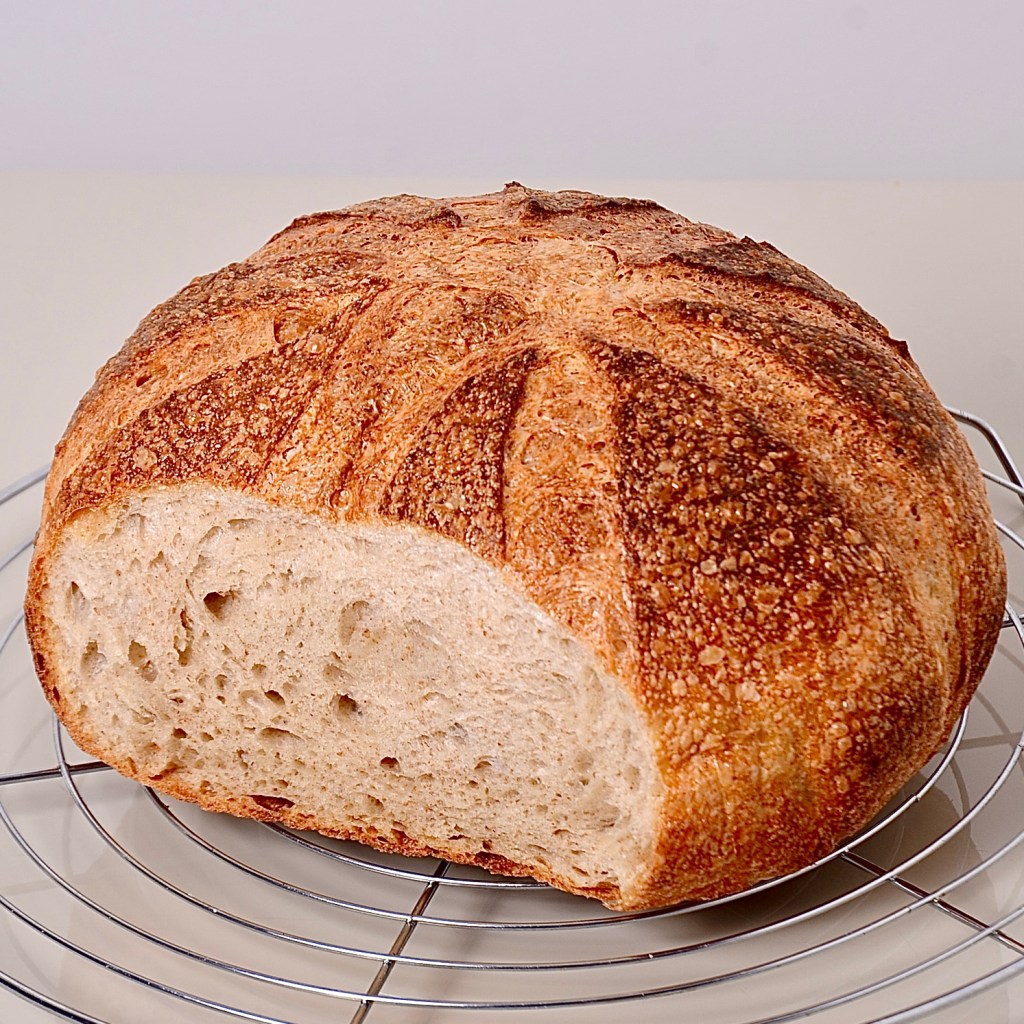
A sourdough starter, also known as a sourdough culture or sourdough leaven, is a mixture of flour and water that has been fermented by wild yeast and lactic acid bacteria. It is the key ingredient used in making sourdough bread as it acts as a natural leavening agent. The starter is made by combining flour and water, and feeding it regularly to keep it active and growing. As the starter ferments, it produces carbon dioxide gas which is trapped in the gluten network of the bread dough, causing it to rise. In addition to providing leavening, the bacteria in the starter also contribute to the unique flavour of sourdough bread. The process of making a sourdough starter can be time consuming, but once established, it can be used repeatedly to make delicious bread with a distinctive sourdough flavour.
After arrives
Sourdough culture is a living and active mixture of yeast and bacteria that needs to be regularly fed and maintained to keep it healthy and active. When sourdough is shipped, it is fed a few hours before shipment, which gives the bacteria time to start fermentation. This ensures that the sourdough is in its peak condition when it arrives at its destination and is ready to be used for creating more starter or for baking sourdough bread, pancakes, waffles, or other baked goods.
However, it’s important to note that sourdough can be sensitive to temperature changes and shipping delays, which can impact the quality of the sourdough. While we make every effort to ensure that the sourdough is shipped promptly with the appropriate packaging and temperature control measures, factors such as extreme weather conditions or logistical issues outside our control may cause delays. In such scenarios, we want advise you to take appropriate caution and follow sourdough revival instructions to activate the culture before use.
Sourdough starter can be sensitive to temperature changes, and shipping during cold weather or long transit times may cause the culture to become sluggish or inactive. In such situations, we recommend customers to revive the sourdough by placing it in a warm place (around 21 degrees Celsius) for a few hours. This will help re-activate the yeast and bacteria cultures in the sourdough and jumpstart the fermentation process.
After a few hours in a warm place, it’s important to feed the sourdough according to the instructions given below to maintain its activity and health. By following the recommended feeding regimen, you can ensure that the sourdough remains active and ready to use for their baking needs.
On the other hand, during the summer months or when temperatures are warm, the sourdough may not require such a warm-up period. In fact, during hot weather, the sourdough may have processed all of the flour that was fed to it before shipment and may require feeding after arriving at its destination. Feeding the sourdough according to the instructions provided can help maintain its activity and health, regardless of the season or temperature.
All the information provided above comprises explanations and theories. Now, let’s break it down even further and go through the step-by-step process.
Ps. The sourdough starter is packed in a resealable food bag. To make removal easier, the best method is to cut off the bottom or one of the sides of the bag, lay it flat on a surface like a kitchen counter, and squeeze the starter out using a spatula or another flat tool. This technique helps minimize waste. For additional instructions, please refer to the guide linked above.
Summarize:
- If your sourdough is delivered at a cold temperature, allow it to reach room temperature before proceeding. This ensures that the starter is in the optimal condition for fermentation. If it’s already at room temperature, you may proceed to the next step.
- Prepare a container for your starter, such as a small jar, and gather your flour and water.
- Add two tablespoons of flour to the container.
- Add two tablespoons of water to the flour.
- Next, add two tablespoons of the delivered sourdough starter to the mixture.
- Use a spoon or spatula to thoroughly mix the ingredients together until you achieve a good consistency.
- Place your sourdough container/jar in a warm environment with a temperature around 21 degrees Celsius.
- The next day, your sourdough will be ready to use.
- Make sure to carefully read these instructions before proceeding.
- Remember to keep feeding your sourdough regularly. It will reward you with beautiful, flavourful bread.
Flour
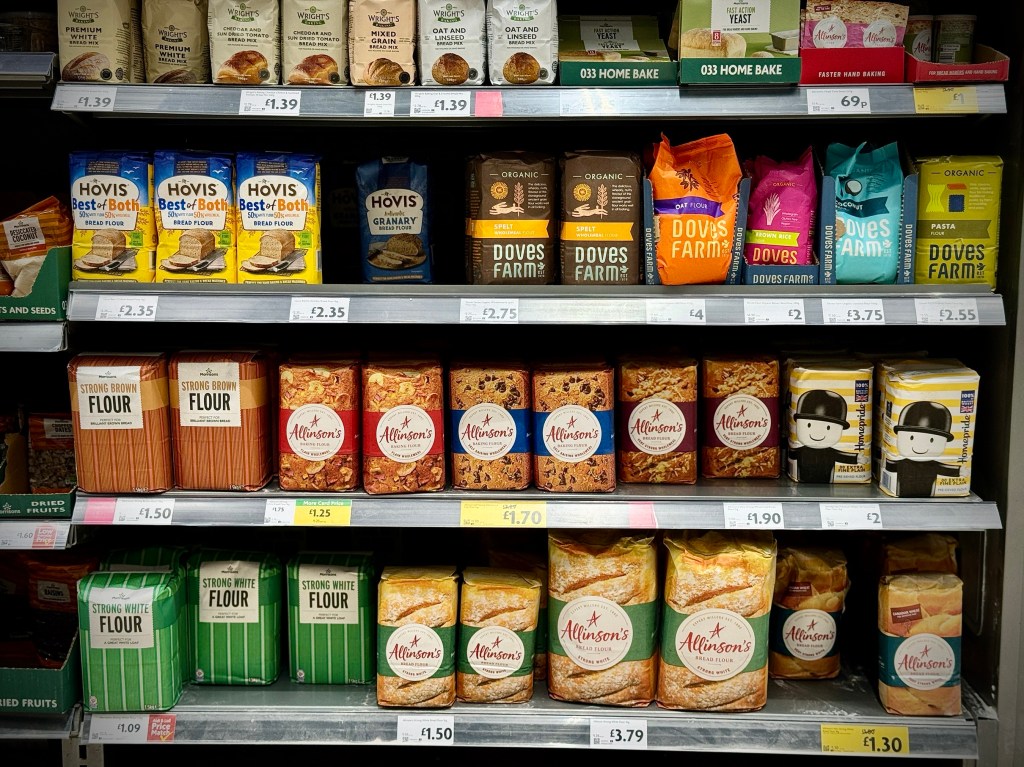
When it comes to selecting the right flour for feed sourdough starter, beginners may feel overwhelmed by the many options available. However, there are several popular flours that can be used to feed your starter. Let’s discuss these options:
- All-purpose flour – As a beginner baker, all-purpose wheat flour is a great option for feeding your sourdough starter and baking basic bread recipes in a standard baking tin. However, one of its disadvantages is the relatively low protein content that lacks compared to bread flour. This can impact the gluten formation in your dough, especially if the percentage of starter in your bread is high, resulting in an inferior texture and structure of your final loaf. To ensure success and develop a robust bread structure and texture, I highly recommend using bread flour here instead of all-purpose flour. While you can find simple sourdough starter recipes online using all-purpose flour, in my experience, using bread flour is a superior choice and a more reliable starting point, particularly for beginners.
Bread flour has a higher protein content that produces a better gluten network for your sourdough dough. This results in achieving a higher rise, better texture, and structure of your final product. So, if you’re new to sourdough baking, consider switching to bread flour to increase your chances of baking a fantastic result
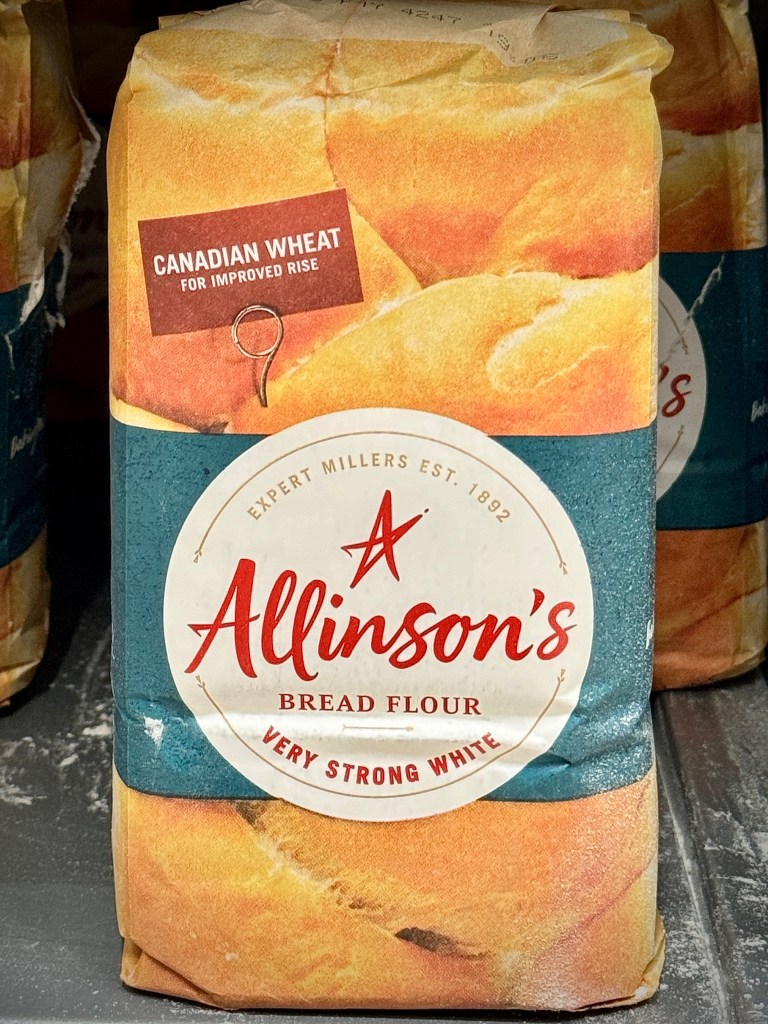
- Wheat Bread flour – Wheat Bread flour is a high-protein type of flour, containing between 12g to 14g of protein. Gluten, the vital component in this protein, creates the desired crumb texture in your bread. It forms a robust support system, called the gluten net, which assists in maintaining the perfect shape and texture of your bread. I highly recommend using bread flour to feed your sourdough starter. This will significantly increase your chances of achieving successful results when baking.
- Wholemeal flour – Wholemeal flour is an excellent choice for not only feeding your sourdough starter but also baking healthy bread. This flour is high in bran, which provides the perfect balance of nutrients to help wild yeast thrive and create a robust sourdough rise. It’s a great starting point for beginners seeking to add some nutritional value to their sourdough bread recipe.
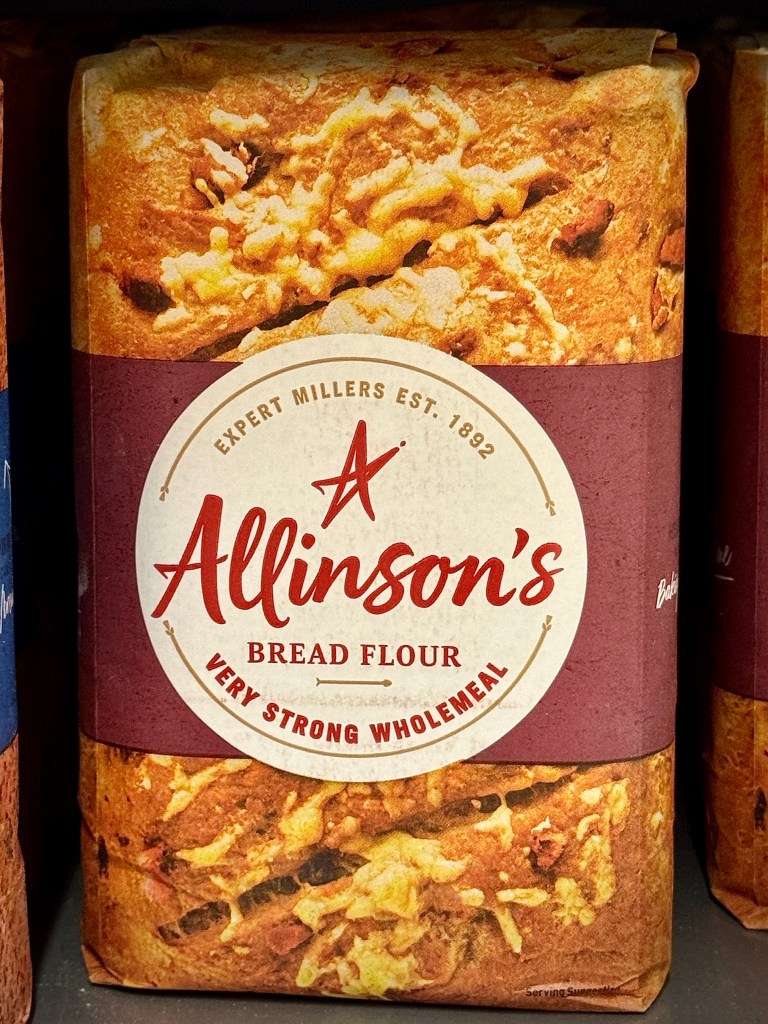
Additionally, wholemeal flour provides a distinctive flavor compared to traditional wheat flours. Moreover, the presence of bran makes it an ideal choice for anyone wanting to add wholesome, subtle nutty flavors to their bread. I personally use wholemeal flour regularly, and I often mix it with white bread flour to increase the protein content and ensure my starter provides enough strength to maintain the texture of my final bread product. Please keep in mind that wholemeal flour has a higher water absorption rate. Therefore, when using any type of wholemeal flour, it is necessary to add additional water to achieve the desired consistency.
- Rye Flour – Rye flour is significantly distinct from wheat flour due to its unique properties.
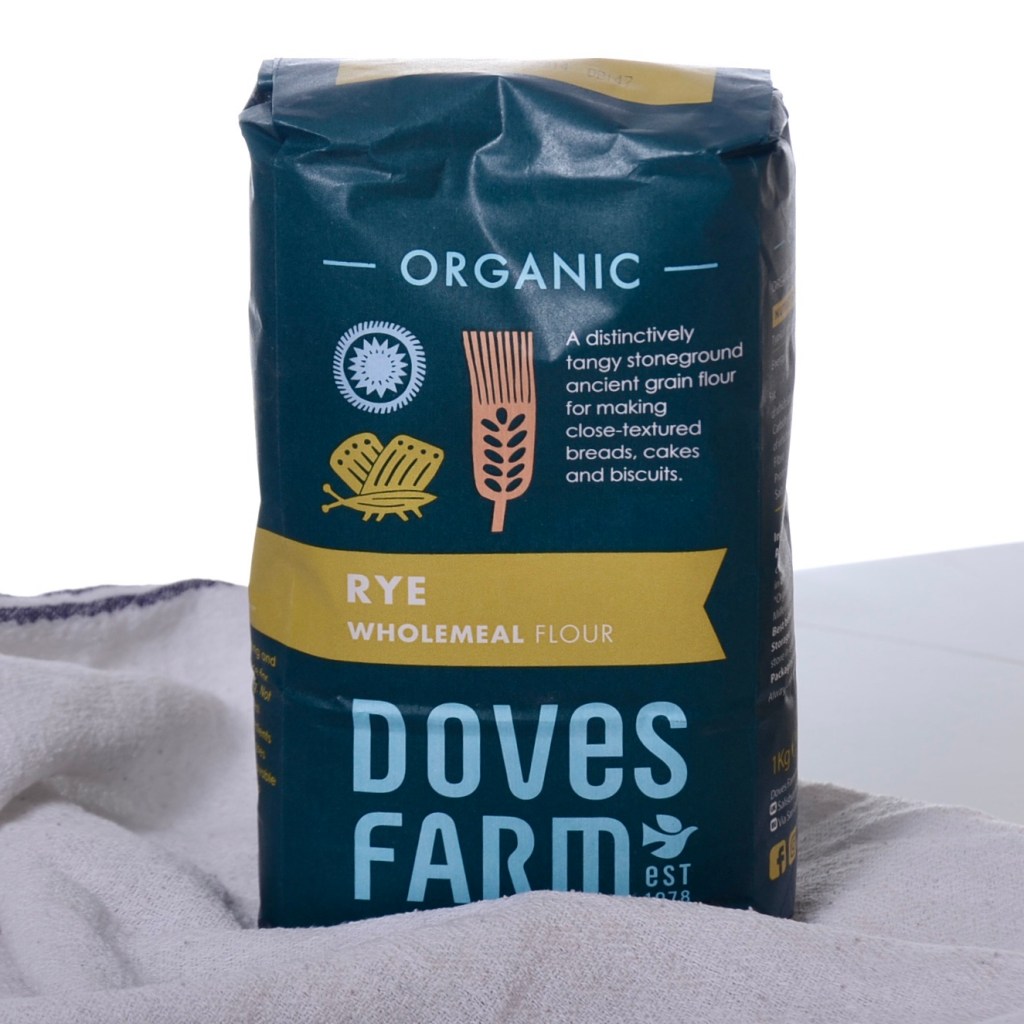
Rye contains a distinct variety of gluten, which can be better tolerated by individuals with
wheat intolerance. Moreover, rye sourdough starter is highly regarded for its strength and its invaluable contribution to the art of bread baking.
As a beginner, you can use either white flour or wholemeal flour to feed your sourdough starter. Wholemeal flour will give your bread a unique flavour and boost the sourdough’s activity due to its higher nutrient content. The bread made with wholemeal flour may have a tangier flavour.
On the other hand, using white flour to feed your sourdough starter can produce a milder flavour in your bread. Sourdough starter that has been fed with white flour is a good choice if you plan to make pastries or sweet baked goods because it can produce a milder flavor in the final product. The acidity levels in sourdough starter are generally lower if fed with white flour as compared to whole wheat flour which tends to produce a tangier taste.
However, it’s important to note that the type of flour used in your sourdough starter will also affect the final flavor of the bread or baked goods. Experiment with different types of flour to find the flavor that suits your taste preference. Ultimately, the flavor of your bread or baked goods will be a result of the combination of factors such as type of flour, hydration of the dough, and the fermentation time. Regardless of the type of flour you use, it’s important to maintain a consistent feeding schedule to keep the activity of the starter healthy and stable.
1:1:1 Method.
Maintaining and regularly feeding your sourdough culture is essential to keep the natural yeast and bacteria active and thriving. These live organisms require frequent nourishment to remain healthy and produce flavourful bread.
For novice bakers, the recommended feeding method is a 1:1:1 ratio, meaning equal parts of flour, water, and existing starter by weight. Let’s say we start with 50 grams of starter. We add 50 grams of flour and 50 grams of water, resulting in a total weight of 150 grams. In general, it is recommended to feed your sourdough starter on a daily basis.
After a certain period, like the following day, it is necessary to feed the starter again. The flour and water provide the nutrients needed for the starter to grow and maintain its activity. At this point, we have 150 grams of hungry sourdough.
To feed the sourdough, we mix 150 grams of the starter with 150 grams of flour and 150 grams of water, maintaining the 1:1:1 ratio. After waiting for another day, the sourdough will have fermented, and as a result, we will have 450 grams of fresh and flavorful sourdough.
You may have observed that we now possess an abundance of sourdough, with 450 grams being adequate for a small local bakery. This is why it is necessary to discard a portion of the sourdough before feeding. When we have 150g of hungry sourdough, we take only 50g to be fed with 50g of flour and 50g of water. The remaining 100g is discarded by transferring it to another jar and storing it in the fridge, which helps reduce waste. To minimize discard, a great option is to keep a smaller portion of sourdough starter and feed it using a 1:1:1 ratio. This means using one tablespoon of sourdough starter, one tablespoon of flour, and one tablespoon of water. This method allows you to maintain a smaller quantity of starter while still providing it with enough food to keep it healthy and active. Remember to adjust the feeding amounts accordingly and plan your baking schedule in advance to make the most of your sourdough starter. Consistent feeding using this approach ensures that the sourdough starter remains fresh, active, and aids proper rising of bread.
Summarize:
The 1:1:1 method means that you feed your sourdough in equal proportions of flour, water, and sourdough starter.
How to feed your culture
Feeding your sourdough starter is crucial because it provides the nutrients that the natural yeast and bacteria in the starter need to stay healthy and active. Without regular feedings, the natural yeast and bacteria in the starter will become inactive, and the starter will lose its ability to leaven bread. Feeding your sourdough starter regularly ensures that the yeast and bacteria in the starter remain active and abundant, allowing you to consistently create bread with a delicious sourdough flavor, a chewy texture, and a lovely crust. When you feed your sourdough starter, you are essentially giving it new life, replenishing the nutrients that it needs to thrive, and creating a healthy environment for the natural yeast and bacteria to continue to grow and ferment. Therefore, it is essential to maintain a consistent feeding schedule to keep your sourdough starter fresh and ready to use for baking.
The 1:1:1 method, discussed briefly above, is the most popular way to feed a sourdough starter. I will repeat and explain it again to make sure everyone understands. The “1:1:1” refers to the ratio of starter, flour, and water used in each feeding. For example, if you have 100 grams of starter, you feed it with 100 grams of flour and 100 grams of water. The biggest mistake when feeding sourdough is when people have a big jar of sourdough and only feed it with a few spoons of flour because they don’t want to waste it. This sourdough will be weak and lack power. To minimize flour waste, keep a small amount of sourdough and feed it using the 1:1:1 method.
To use the 1:1:1 method, begin by removing a portion of your mature sourdough starter from its container and placing it into a new container. Then, add an equal weight of flour and water to the starter. Mix well, cover the container, and allow the mixture to ferment at room temperature until it is bubbly and fragrant. This process typically takes 4 to 12 hours, depending on the temperature and strength of your starter.
If you plan to store your starter in the fridge, remember to wait at least an hour after feeding before placing it in the fridge. This allows the starter to begin fermenting before slowing down in the cooler temperature. Once the mixture is ready, remove the amount you need for your recipe, and feed the remaining starter again with 1 part starter, 1 part flour, and 1 part water. This process can be repeated daily, or every 12 hours if you would like to maintain a more active starter.
Using the 1:1:1 method consistently over time will help to cultivate a strong, healthy sourdough starter that produces high-quality bread. Please note that the value of 100g is used only as an example, and what is important in the 1:1:1 method is the equal ratio or proportion of starter, flour, and water used in feeding the sourdough.
Looking at it from the other side, to make 180g of sourdough for your next baking, you can use the 1:1:1 method to feed your starter. Take 60g of your active sourdough starter and combine it with 60g of flour and 60g of water to make a total of 180g of sourdough.
It’s important to keep in mind that different types of flour, especially wholemeal flours, may require varying amounts of water to maintain the same consistency when using the 1:1:1 feeding method for a sourdough starter. Wholemeal flours tend to absorb more water than white flour, so you may need to add a bit more water along with the equal amount of flour and starter while feeding your starter.
To manage your sourdough starter smartly and avoid ending up with excessive amounts, it’s important to follow these steps:
- Take out the required quantity of starter needed for your recipe and use or discard the remaining starter. This will prevent it from accumulating and becoming difficult to handle.
- Feed your sourdough starter in smaller portions. Instead of refreshing the entire batch, you can take a small amount of your existing starter and feed it with equal parts of flour and water based on the 1:1:1 ratio. This helps maintain a manageable size and reduces waste.
- Plan ahead and schedule your baking. By being mindful of when you’ll be using your sourdough, you can adjust your feeding schedule accordingly. This way, you’ll have the perfect amount of sourdough ready when you need it.
Taking these steps will enable you to keep an appropriate quantity of sourdough starter without it overwhelming your baking routine, ensuring a smart and efficient approach to sourdough maintenance.
1:5:5 Method – A Slower and More Stable Feeding Approach
While the 1:1:1 feeding method is ideal for beginners and provides a great foundation for understanding the feeding ratio of your sourdough starter, it does have its limitations. One of the first things you’ll notice when feeding with a 1:1:1 ratio is how quickly your starter becomes active. At first glance, this seems like a good sign – your culture is clearly alive and vigorous. And indeed, when you’re preparing to bake and need your starter ready within a few hours, this rapid fermentation is a real advantage.
However, when your goal is not immediate baking but rather keeping your starter healthy and strong over time, this fast rise can become a disadvantage. A 1:1:1 starter in a warm environment can peak and fall within just a few hours, which often results in the starter becoming hungry too quickly. If your starter spends long periods in a “hungry” state – collapsed, inactive, and starved of nutrients – it can weaken significantly. A weakened starter not only lacks the strength to rise your dough properly but may also develop an overly sharp or acidic flavour due to its consistently low pH.
In fact, under warm conditions, the 1:1:1 method may require two feedings a day just to keep your starter from going too long without food. For example, if you feed your starter in the morning, it might peak in the afternoon and begin to fall by evening, entering a hungry phase overnight. Repeating this cycle regularly can wear out your culture.
A simple and effective solution to this problem is to adjust the feeding ratio – instead of 1:1:1, switch to the 1:5:5 method. This means using one part starter to five parts water and five parts flour by weight. For example, if you keep 10 grams of starter, feed it with 50 grams of flour and 50 grams of water. This significantly increases the amount of food available, giving your starter more time to consume it and remain active without becoming hungry too soon.
What does this look like in practice?
If you’re feeding your starter daily and not baking every day, it’s perfectly fine to keep just the small amount that sticks to the inside of the jar. Simply add a spoonful or two of flour and the same amount of water. Add water slowly and mix until you get a thick consistency – it’s better to keep your starter on the firmer side, as a thicker starter ferments more slowly and is easier to manage.
The key idea here is to minimise the amount of time your starter spends in a collapsed, hungry state. A starter that is regularly left hungry becomes weak and unreliable. It will struggle to rise your dough properly and produce bread that is both flat and overly sour, due to the low pH of a starving culture.
Using the 1:5:5 feeding ratio helps maintain a stronger and more stable sourdough starter over time. It provides enough nourishment for the wild yeast and bacteria to remain active longer between feedings, reducing the risk of your starter becoming exhausted or overly acidic. In return, your starter will reward you with a more balanced flavour and better leavening power when you’re ready to bake.
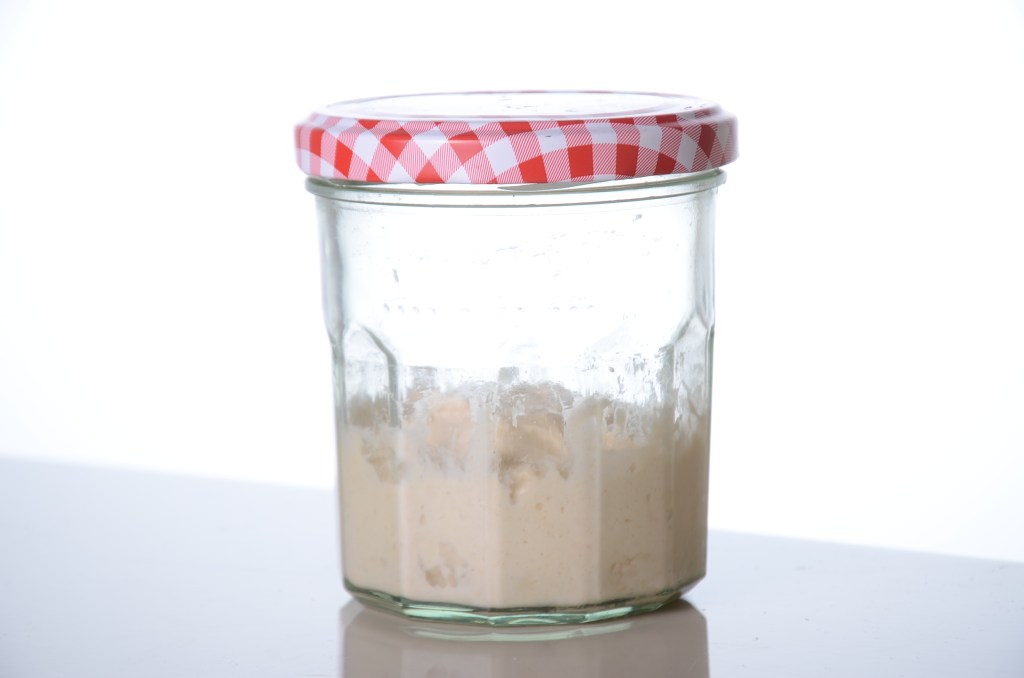
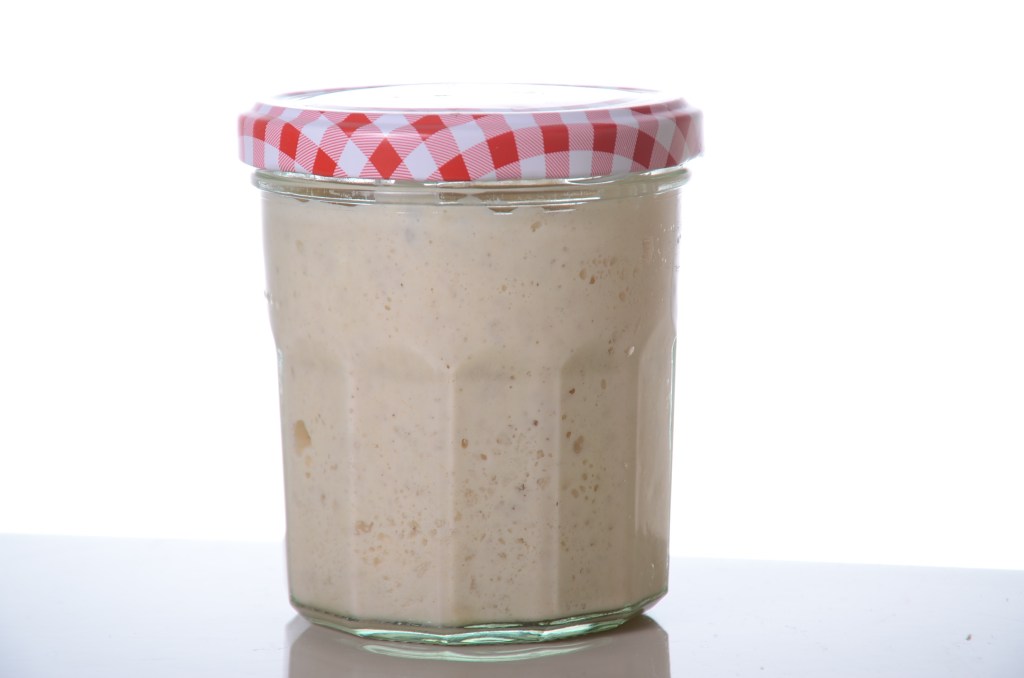
How to keep it
The optimal method of storing your sourdough starter is by keeping it in a glass jar with a lid. This creates a conducive environment, enabling the natural yeast and bacteria in your starter to remain active. For home baking purposes, a small jar is usually sufficient, as this allows you to maintain a small amount of starter and reduce the waste. It’s important not to store your starter in a jar that’s too large, as this can make it more difficult to maintain and lead to the creation of too much starter. This can be a waste of flour and can also require more frequent feedings to keep up with the larger amount of starter.
To minimize the discard, it’s crucial to sustain a small amount of sourdough starter needed for your recipes. Keep only the required quantity, and discard the surplus regularly to prevent the starter from overgrowing and going bad. Although there are several recipes that incorporate sourdough discard, I won’t be discussing those recipes at this moment.
There are two ways to maintain your sourdough culture- you can store it on the counter, or you can keep it in the fridge.
If you plan to use your sourdough culture frequently, it’s best to keep it on the counter at room temperature. This is because the natural yeast and bacteria in the sourdough culture thrive in warm environments, and keeping it at room temperature makes it easier to use for baking. However, you’ll need to feed it daily or every other day to keep it active and healthy. If you plan to bake your sourdough bread less frequently, refrigerating it is an option. This causes the fermentation process to slow down, thus reducing the need for constant feeding. When refrigerated, sourdough starters can be fed once a week or even less frequently, and can last for months.
It’s important to note that both methods work, but using a combination of both improves the flavor profile and texture of the bread. When storing on the counter, the sourdough culture ferments faster and has a pronounced sour flavor, while keeping it in the fridge slows down fermentation, creating a milder flavor.
In the fridge.
If you’ve decided to keep your sourdough starter in the fridge because your baking schedule is once a week or less, it’s essential to remember a few key rules.
Firstly, make sure to feed your starter before placing it in the fridge to keep it active. After feeding your sourdough starter, it’s important to allow it to ferment for some time before placing it in the fridge. The time required for the fermentation process to begin may vary depending on factors such as temperature and water content, and can range from one to three hours. It’s crucial to keep an eye on the signs of fermentation, such as bubbles and a sweet, tangy aroma, to determine when the starter is ready for refrigeration. This step ensures that the starter remains healthy and active, ready for its next use in baking.
Secondly, to ensure that the yeast and bacteria in your sourdough starter remain healthy and active, it’s essential to feed it with fresh flour and water at least once a week. If you’re taking your starter out of the fridge, it’s important to let it come to room temperature before feeding it to avoid any temperature shock. This means allowing the starter to sit at room temperature for about an hour before feeding it with fresh flour and water. This practice will help maintain the health of your starter and ensure it’s ready for your next baking adventure.
Lastly, allow the starter to reach room temperature and feed it again before using it for baking. These rules will help ensure that your sourdough starter remains healthy and active, and produces delicious bread.
Let’s try breaking down the process of feeding into points for better understanding:
- Take your sourdough starter out of the fridge and place it on the counter at room temperature, ideally around 21°C.
- Wait for approximately 2 hours until the starter reaches room temperature.
- Measure the required amount of sourdough starter for your bread recipe. If you’re not baking at the moment and only want to feed your starter, proceed to the next step.
- Take a portion of your sourdough starter (e.g., 50g) and transfer it into a new and clean container or small glass jar. Using a fresh container helps prevent the growth of mold in your sourdough. Add an equal amount of flour (50g) and an equal amount of water (50g).
- Thoroughly mix everything until the consistency becomes smooth.
- Allow the mixture to sit for about 1 hour to ensure that the wild yeast within the starter starts the fermentation process.
- Return your sourdough starter back to the fridge, where it can be stored for another week or a maximum of 2 weeks.
- Repeat the process regularly to maintain a healthy and active sourdough starter.
On the counter.
Storing your sourdough starter on the kitchen counter is actually the most preferred and widely used method. However, for those who bake less frequently – once a week or less – refrigeration can also be a good option. Nevertheless, keeping your starter on the kitchen counter allows it to be conveniently located and easier to access for daily use. Additionally, the starter is more likely to remain healthy and active if it is kept at room temperature, and it will be ready to use whenever you need it.
I bake bread two to three times a week and keep my sourdough starter on the kitchen counter for convenience. To ensure that my sourdough stays fresh and healthy, I feed it every day. Having a sourdough starter on the counter has many benefits. However, it’s important to remember to monitor your starter, as it may need to be fed more frequently. In the winter months, it’s especially crucial to provide your sourdough starter with a source of heat, as it needs to be kept at a minimum temperature of 20-21 degrees Celsius after feeding.
Another advantage of keeping your sourdough bread starter on the kitchen counter is that you can learn a lot about dough rise. By observing your starter carefully, you can gain insight into how it behaves and how it affects the dough when making bread. Over time, monitoring your sourdough every day will give you a better understanding of how it rises and how it acts. This knowledge can be helpful in producing consistent and high-quality bread.
Again, let’s break down the process into steps for better understanding:
- Start by taking two tablespoons of your sourdough bread starter and placing it into a container or small jar.
- Add two tablespoons of flour to the jar.
- Next, add two tablespoons of water.
- Mix everything together thoroughly.
- Finally, place the jar or container in a warm location, ideally around 21 degrees Celsius.
- Keep an eye on your sourdough from time to time. After a few hours, the temperature becomes less significant.
Discard
As you continue to feed your starter, you may find that you produce a lot of discard. This is the leftover portion of the sourdough that you remove before each feeding. If you feed your starter daily, you’ll notice that the amount of your starter quickly increases. It’s crucial to maintain the minimum required quantity of sourdough to prevent an overwhelming amount of discard. You don’t need to keep the starter in a large jar because, with this feeding method, you can increase the amount of starter quickly in just a few days if needed. This is why it’s important to discard a portion of your starter to maintain a manageable quantity.
When you have excess discard sourdough after the feeding process, you may wonder what to do with it. One option is to collect it in a separate jar or container and use it later for making delicious discard sourdough bread recipes. These recipes are perfect for beginners and are relatively simple to make. However, it’s important to note that discard sourdough may not have enough yeast activity for making loaf breads.
While bread is one popular way to use discard sourdough starter, there are many more recipes that you can try. For instance, you can use it to make delicious sourdough pancakes, crackers, scones, cookies, and numerous other recipes. So, don’t hesitate to explore and experiment with different recipes to make the most of your sourdough starter.
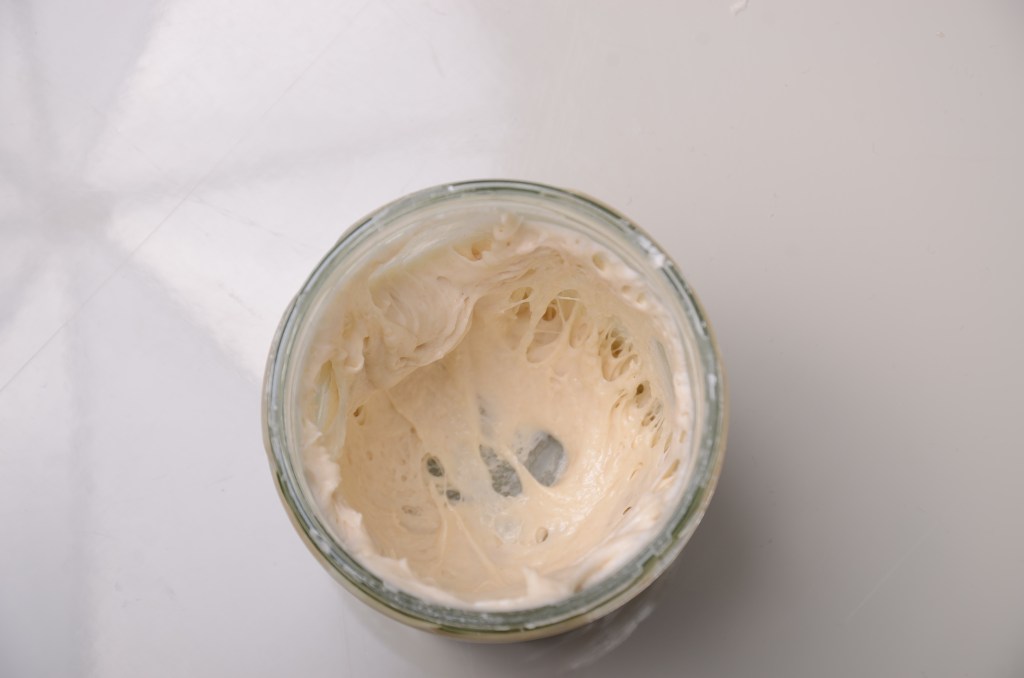
When your starter is ready?
Your sourdough starter is ready to be used for baking when it has reached its full activation point, which means it has doubled in size, has a bubbly and frothy texture, and has a sour, tangy aroma. The ideal time to use your starter can vary depending on the ambient temperature, the flour type you’re using, and the ratio of flour to water in your starter.
In general, you should see activity in your starter within four to six hours of feeding it, and it will be at its peak between 12-24 hours after feeding. However, you can also use your starter earlier or later depending on your baking schedule and the desired sourness of your bread. Just keep in mind that a starter that has been inactive for too long or has over-fermented will not provide desirable results in your baking.
Revival instruction
It’s common to struggle with maintaining a feeding regimen for your sourdough starter, and it can easily be forgotten on the counter or left in the refrigerator for a while. Don’t worry, it’s not the end of the world, as your starter is just incredibly hungry. While some of the wild yeasts may have died off, I believe there’s still some life left in it. To revive your sourdough, follow the instructions below, and you should be able to give it a new lease on life.
- Take your starter out of the fridge and let it sit at room temperature for a few hours to warm up.
- Remove any discolored or hooch (the brown liquid that sometimes forms on top) from your starter.
- Using a clean spoon or spatula, remove about half of your or even more starter and discard it in the trash or compost.
- Feed the remaining half of your starter with equal parts flour and water (for example, 50g flour and 50g water).
- Stir the mixture vigorously and let it sit at room temperature for 12-24 hours.
- In the next feeding, use a larger amount of flour and water to increase the size of your starter and repeat the feeding as often as necessary until your starter is healthy and active again.
Remember, healthy sourdough starters are resilient and can often recover from neglect with a little bit of care and attention.
That is only the beginning of your sourdough journey, but now you know how to keep your sourdough happy. Follow the instructions and create good habits of feeding your starter, and you will achieve great success. Remember, if we say to give a bit of warmth to your sourdough starter, it doesn’t mean you have to give it a hug. It just means it needs a source of heat to stay active and healthy. But a hug is always welcome too! Good luck and happy baking.
All rights reserved. No part of this publication may be reproduced, distributed, or transmitted in any form or by any means, including photocopying, recording, or other electronic or mechanical methods, without the prior written permission of the author. Copyright belongs to Cake by A&B.
You might also be interested in:
Wheat Sourdough: A Foolproof Recipe for a Perfect Loaf with Wholemeal Twist
Classic Wheat & Rye Sourdough Loaf – Perfect for Beginners
Understanding Sourdough

The key to success in baking bread is understanding what your bread starter needs to thrive.
Temperatures Sourdough Bread Starter, storage temperature.
The storage temperature of the sourdough starter is a crucial factor in providing optimal conditions for its health and vitality.
Sourdough Starter Showdown: Which One is Right for You?
For beginners, selecting a starter can feel overwhelming. With so many options available—such as rye, wheat, spelt, https://baking-passion.com/sourdough-starter-showdown-which-one-is-right-for-you/and whole wheat—it’s easy to get confused. However, the process is simpler than it seems, and I’ll break it down for you in an easy-to-understand way.